
Installing CentOS with Adaptec Series 7 RAID Controllers
Here at Crucial we believe in keeping things simple, but not at the price of better performance. In terms of the hardware we deploy across our range of services we keep an N+1 spares configuration at a bare minimum and vastly exceeding this for the majority of hardware.
As such when we are testing new hardware for suitability of deployment across our server configurations, we like to be sure we are onto a winner before deploying across production server environments with guaranteed uptime. This involves a lot of research before exhaustive testing and once that is done we research and test again & again and then some!
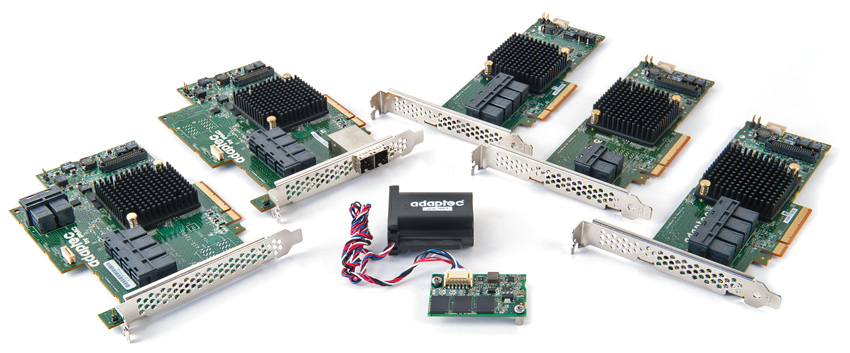
In recent months some of the more recent hardware we have tested and deployed includes the latest ranges of RAID Controllers from LSI and Adaptec, both of which offer impressive performance and new features. In some upcoming blogs I will go into more detail regarding some of the testing and benchmarking we’ve been running on these controllers.
In the meantime I’m going to run through the installation of an OS on an Adaptec 71605 RAID Controller. In doing so, detailing some of the issues encountered with an otherwise trivial task on a very new piece of hardware. Such as when documentation for a range of issues is unclear or simply does not yet exist!
Across most enterprise environments and especially within the hosting industry the move towards CentOS 6.x has only recently begun to pick up. With a vast majority of servers, especially in the cPanel/WHM sphere still running CentOS 5.x.
The main issue faced with using hardware well ahead of the Operating System curve is driver support. At present even the latest versions of most Linux distributions, including CentOS 6.3 do not include the latest drivers for Adaptec Series 7 RAID Controllers, given that they are less than 3 months since release and even less in terms of actual availability this is not surprising.
If you ever installed a RAID Controller on a Windows or Linux system back in the day when driver support was in extreme infancy or you chose a cheaper less supported brand, you will know the pain of the “driver disk” installation. Thankfully things have improved somewhat, but when you wish to install an older OS on a cutting-edge RAID adapter especially when it hasn’t been a requirement most users for sometime, you’re going to run into complications pre and post OS installation. Here’s how to do things properly.
CentOS 5.8 Installation on Adaptec Series 7 based RAID Controllers:
- 1) Once you’ve installed your shiny new Adaptec RAID controller, you will want to boot into the RAID BIOS and create your arrays as you would normally.
- 2) Without the right drivers for your RAID Controller, your OS or rather any OS you wish to install will not be presented with the disks made up by your newly create RAID arrays.Being as new as Series 7 is, the included drivers available for download don’t work for all the operating systems listed (like CentOS!), there is not even a publicly available link for the required CentOS aacraid driver files on the Adaptec website. However, you will find what you require in a Adaptec Support Knowledgebase article 17202, found here.
- 3) Once you have downloaded the required drivers for CentOS 5.x:
aacraid-1.2.1.29900-RHEL5.8-dd.img
aacraid.conf
dkms-2.2.0.3-1.noarch.rpm
aacraid-1.1.7.29900-dkms.noarch.rpmAdd them to a USB flashdrive.
- 4) Boot the server as normal with your CentOS installation disk/media attached as primary boot device. When the terminal based graphical welcome screen appears and you see the line
"Install a new system or upgrade an existing system"Connect your USB flashdrive containing the Adaptec CentOS 5 drivers then type:
linux ddpress enter
- 5) CentOS installation will begin, continue until you are asked if you have a ‘driver disk’ and select yes. You will need to select the USB flashdrive you have attached, which is likely to be /dev/sdb1
Once you’ve selected/mounted the right device, find and select the “aacraid-1.2.1.29900-RHEL5.8-dd.img” file as your driver.
This contains everything necessary for the installation to recognise your arrays on the Adaptec Series 7 Controller as disks for you to use during OS installation.
- 6) Complete installation, temporarily remove USB flashdrive, reboot etc.
- 7) From here everything is fine, the kernel knows to load the aacraid module on boot. However, the moment you run ‘yum -y update’ or upgrade/install anything additional eg. upgrade kernel, move to Xen kernel etc. you will lose connection to the correct module. So we need to do the following:
Reconnect USB flashdrive, find the correct disk via ‘fdisk -l’ and mount it:
eg. mount /dev/sdb1 /mnt
Copy all files to root or suitable location:
mkdir /root/adapteccp /mnt/* /root/adaptec
Copy the aacraid.conf file to /etc/depmod.d/
cd /root/adaptec

cp aacraid.conf /etc/depmod.d/ - 8) Before running a full ‘yum update’ you need to setup any new kernels that you wish to run so it will recognise the correct Adaptec aacraid driver. Failing to do so will cause a kernel panic on boot and you will need to manually select the originally installed or correctly configured kernel to boot normally.Install Adaptec .rpm’s:
rpm –Uvh dkms-2.2.0.3-1.noarch.rpm

rpm –Uvh aacraid-1.1.7.29900-dkms.noarch.rpm - 9) Run yum update – Note this will update the kernel to latest version.As of writing the latest CentOS 5.8 ISO installs with kernel 2.6.18-308.el5. The latest kernel available kernel is 2.6.18-348.1.1.el5 and you’ll probably want to install the latest.For example, with our own virtualization purposes we will run the latest Xenified kernel 2.6.18-348.1.1.el5xen.
yum install kernel-xen-$(uname -r) - 10) You will also require the kernel-headers, kernel-devel and gcc packages:
yum install kernel-headers-$(uname -r)

yum install kernel-devel-$(uname -r)

yum install gcc
If running Xen also run:
yum install kernel-xen-devel - 11) Important: once kernel is updated we need to build and install the kernel module for aacraid support using DKMS – Dynamic Kernel Module Support:Move to location of Adaptec drivers eg.
cd /root/adaptecadd/build/install aacraid module to specified kernel versiondkms add -m aacraid -v 1.2.1.29900 -k 2.6.18-348.1.1.el5xen
dkms build -m aacraid -v 1.2.1.29900 -k 2.6.18-348.1.1.el5xen
dkms install -m aacraid -v 1.2.1.29900 -k 2.6.18-348.1.1.el5xen - 12) Check your grub.conf to make sure the right kernel is defaulted. Reboot and you should be running on the new kernel with the correct Series 7 aacraid module.
Note: dkms can only be done for one kernel at a time. If you switch kernels you will need to run ‘dms uninstall’ and re-add/build/install for alternate kernel.
One last note, as with all cutting edge hardware keep an eye on your RAID Firmware updates. The 71605 is already onto it’s 4th update since November 2012!
And there we have it. Stay tuned for some future blogs on RAID testing and benchmarking we are carrying out on these latest RAID Controllers.
| Hosting Options & Info | VPS | Web Solutions & Services |
|---|---|---|