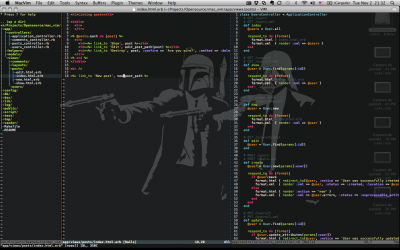
Creating the Ideal VIM Working Environment
Creating the Ideal VIM working environment. Everyone has a favourite text editor / programming IDE, depends what you do day to day and what you grew up with to what you might use, whether this is VIM / Nano / emacs / percl or notepad++!
However my favourite is VIM and today I will share with you my simple vimrc that makes my life just that little bit easier!
- What is Vim?
- VIM is an advanced text editor, commonly referred to as the “programmers editor”.
It’s the middle editor between emacs and anything else (notepad++?), it provides an interface to efficiently model and develop how you will be working with your text.
But with that, it’s not only just for programmers, it can be used with anything from Authoring to Administration, the possibilities are really endless with VIM, the only thing I don’t think you do is run Conways Game of life on it!
- VIM is an advanced text editor, commonly referred to as the “programmers editor”.
- Why is it so damn awesome?
Top five reasons I use VIM:- It’s free, it’s updates are free, it’s opensource, I can modify it and I love it because I’ll know it’ll always remains that way!
- The array of commands are vast but still simple, once you learn the basics (indention for example) you can do anything you’d normally do with any other text editing IDE!
- It has so many modules, plugins and inbuilt features, it makes for an amazing experience once you customise it (syntax coloring, highlighting, search / replace / macro support, indention management, tabular management, code completion!)
- It’s ubiquitous, it’s available on nearly anything, including Windows! (though I’d never use that, but I’ve used VI on my xbox before, so ha!)
- Once you master the VI, you’ll never need to leave your blackened terminal screen again!
- What is .vimrc?
- The .vimrc file is your environmental settings for VIM / VI, it usually situations itself in either /root/.vimrc or /home/[user]/.vimrc, but with both of those options you can just reference it as ~/.vimrc 🙂
- Karl’s typical vimrc:My typical .vimrc file contains the following:
------------VIMRC-------------- color delek set number set cindent set smartindent set autoindent set expandtab set softtabstop=2 set shiftwidth=2 " When editing a file, always jump to the last cursor position au BufReadPost * \ if ! exists("g:leave_my_cursor_position_alone") | \ if line("'\"") > 0 && line ("'\"") - Lets break this down so we know what each of these lines do:
- “color delek”
- This sets the theme syntax color to the style delek, there’s many more but after trialing all of them, this makes me not cry as often 🙂
- “set number”
- This sets the side bar line numbers to show, I find it useful, however it makes for a huge pain if you want to quickly copy/paste in putty, if you use this, ensure you remember off the top of your head “set nu!” to turn it off when you need to, without having the edit the vimrc file!
- “set cindent”
- This turns on C conforming / style indention, it’s very useful and I recommend it to anyone, but remember, this makes pasting a bitch – it sometimes doesn’t know to pull back indents!
- “set smartindent”
- This turns on the VIM intelligent indention mechanism, typically C-line indention / autoindent will retain the same indention level when you type reconisable code like “while(true) {” then hit return, However with smartindent + autoindent you can have it auto tab in and out for you!
- “set autoindent”
- This turns on the VIM auto intention mechanism, important if you want indention to work correctly!
- “set expandtab”
- This turns on the inbuilt tab to spaces converter, which when tabular keystrokes are actioned, the are converted on the fly to spaces, whilst retaining the tabular size they needed to increase by!
- “set softtabstop=2”
- This tells VIM how many columns to increment / deincrement by when a tabular expression is actioned, as you can see I have set it to 2!
Some people like to set this to arbitrary numbers like 8 or even 12, bad Idea, stupid and makes it very hard to read, try for yourself, find your favourite column count!
- This tells VIM how many columns to increment / deincrement by when a tabular expression is actioned, as you can see I have set it to 2!
- “set shiftwidth=2”
- This tells VIM how many columns to increment / deinrement by when the shift operators are actioned, the shift operators are “>>” and “<
- The last one is the remaining code there, which is actually one function, it’s meant to place the cursor back at the original location of where it was last present in the previous session you had.
This is to say, if you exit VIM and reopen the file, your cursor would be in the same location.
- “color delek”
- Final note:
- This is just the tip of the iceburg for VIM, there is so many things you can do with it, so get exploring, get familiar and get customising!
Thanks,
Karl.
| Hosting Options & Info | VPS | Web Solutions & Services |
|---|---|---|

