

How to Backup and Restore using R1Soft CDP
You’re only as good as your backup solution. Like any IT company, at Crucial we spend a good portion of our time not only ensuring all infrastructure is running around the clock, but also ensuring the three R’s – Redundancy, Redundancy & Redundancy.
From the infrastructure layer with RAID arrays and multiple production & backup SAN solutions serving & backing up data, to our actual backup policies or strategies. Employing automation, verification & multiple backup sites. However, even the best backup solution or strategy in the world is infective if it is not easy to use, especially from a customer standpoint.
While there are endless methods to backup data few are as easy, powerful & intuitive as R1Soft Continuous Data Protection. Especially in today’s hosting environments, where customers require fast & easy access to their backed up data. For this very reason, we offer R1Soft CDP automated backups for customers across our range of hosting services from Shared to Virtual & Dedicated.
The following article will detail just how easy it is protect your mission critical data along with restoring your important data when mistakes or disasters occur.
First off, a little detail about Crucial’s R1Soft backup infrastructure. In order to meet customer demand and ensure maximum redundancy & effectiveness for customers, we’ve put our extensive VPS & Cloud hosting experience to work. Each R1Soft Backup Server our customers login to, is a VM running on a high-powered Citrix XenServer node connecting to iSCSI volumes running on our clustered backup SAN infrastructure. All R1Soft disk safe’s are stored across this cluster, currently comprised of 6 SAN storage nodes. Each node containing 8TB of SAS RAID storage and network RAID5 across the cluster, offering high performance & multiple levels of redundancy. The added benefit being we can scale out horizontally for both R1Soft backup servers and storage nodes as required.
For those of you unfamiliar with R1Soft (Recently rebranded as “Idera”), it works on a server & client model. A ‘agent’ is installed on the client machine which runs in the background. On the ‘server’ end an account is created on an R1Soft backup server, this includes a ‘Disk Safe’ (a volume containing your incremental backups) and a ‘Policy’ or schedule, which sets when the server contacts the client or agent and initiates a backup.
R1Soft offers block level replication of your data. On first run an initial replica of your file system is backed up and each subsequent backup uses block level deltas to track the changes and take an incremental backup. In short, this allows you to store multiple incremental snapshots of your file system at the block level, which you can revert to at any time by restoring either individual files & folders. R1Soft will present all of this to you in an intuitive WebUI, so you can login, view your available restore points & options, click a button and have your files restored.
R1Soft also offers a database addon, which will interface with your MySQL or MSSQL database & take block level backups without needing to lock your databases like other solutions. Accidentally ruin a single database table? No problem, you can simply choose the most recent or suitable restore point and replace only that table. Messup an entire database? Again, no problems. In extreme cases there is also a complete file system restore option, known as a ‘Bare Metal Restore’. We have long since lost count of customers who have been saved by this option.
The following will guide you through some of the basic options that R1Soft will offer you.
Backup 101: How to Backup & Restore using R1Soft CDP
- Logging In
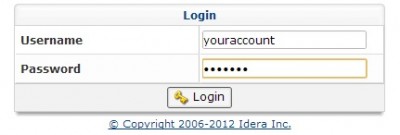
Every customer who orders the R1Soft Backup Addon will be individually setup and then supplied with login details which they can use to fully manage their backups.
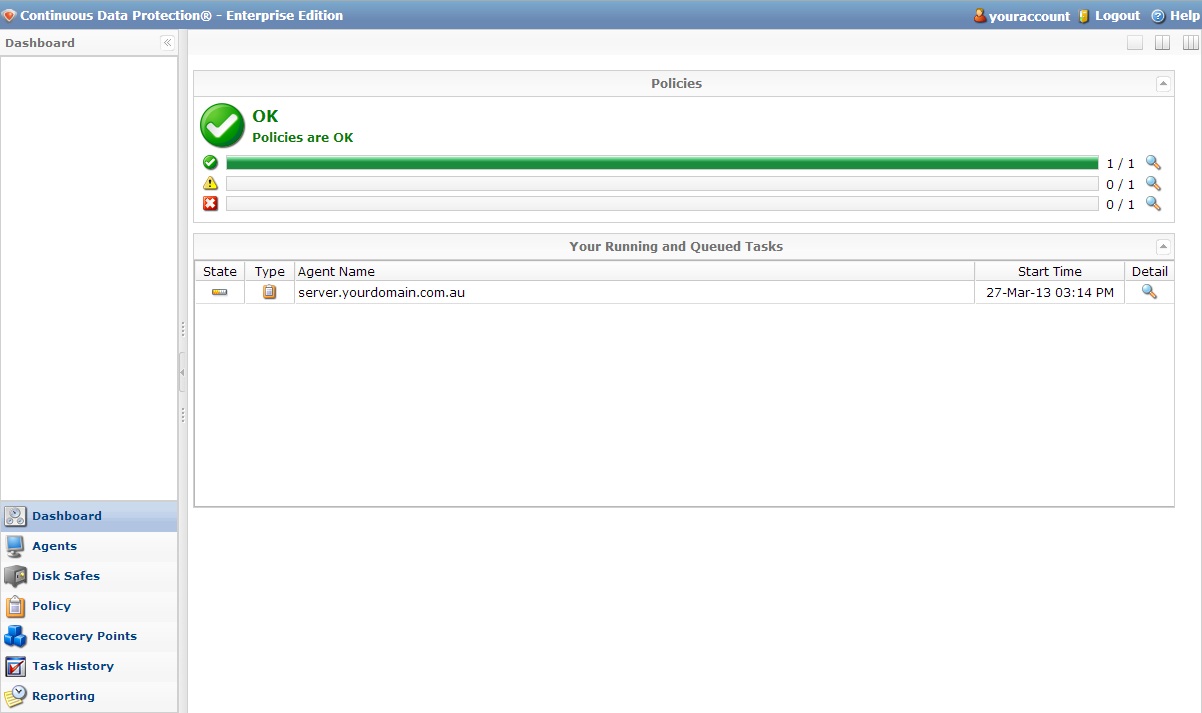
- The Dashboard
Once you’ve logged in, you are greeted by the CDP Dashboard. Which offers links to manage your backups and a quick reference of your backup Policies (either OK or not OK) and any current running tasks (backups or restores).
- Task History
The Task History will show you exactly that. You get a quick reference if your backups & restores have been successful.
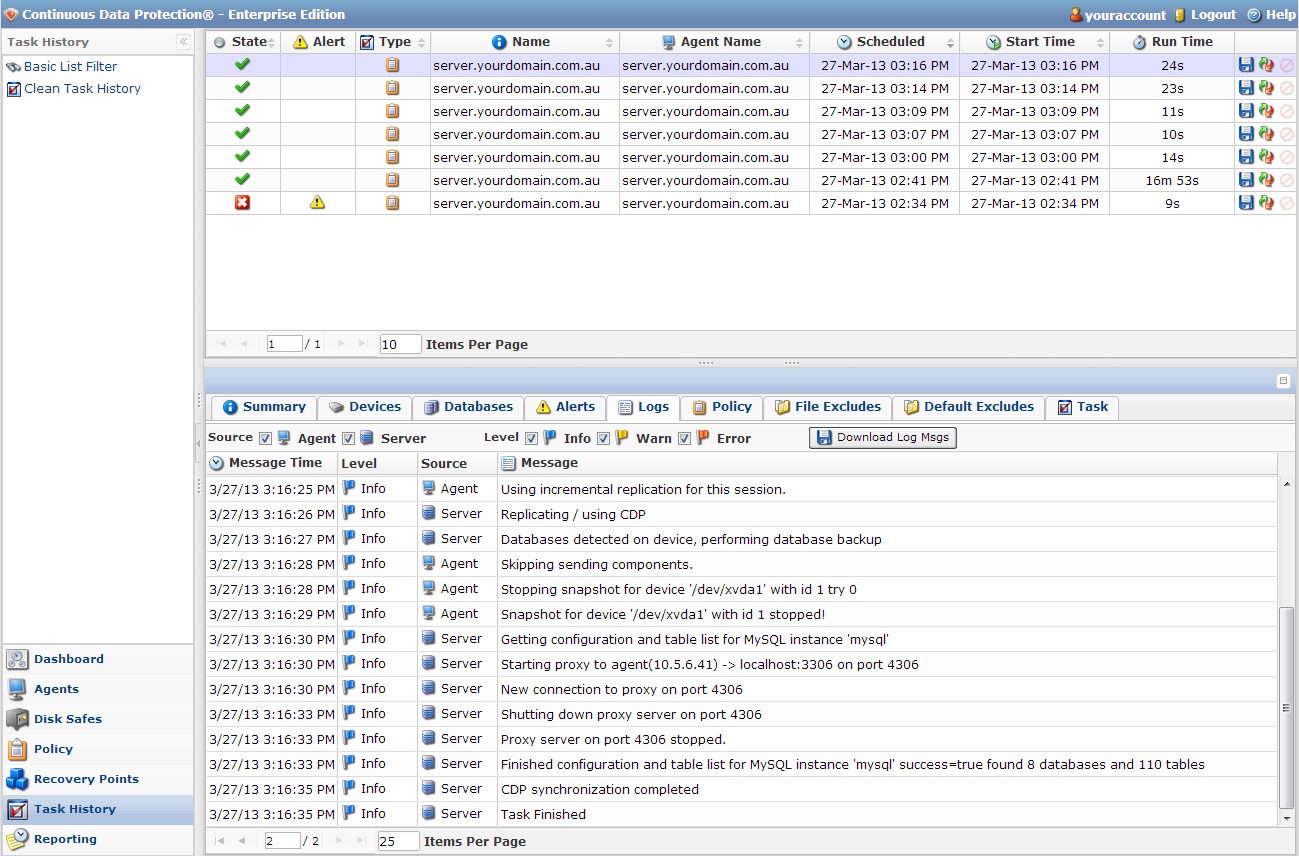
You can click each entry and check any alerts or logs, for example to see why a backup may have failed as in this example the backup agent is not installed correctly on the client machine.

- Recovery Points
The Recovery points page is again, self-explanatory. A quick layout of all available backups you can restore to. Our standard R1Soft Backup Addon offers customers nightly backups with 7 day retention ie. so you can restore your files dating back the previous 7 days. However, R1Soft allows you to set this any way you wish eg. minutely, hourly, daily, weekly, monthly etc.
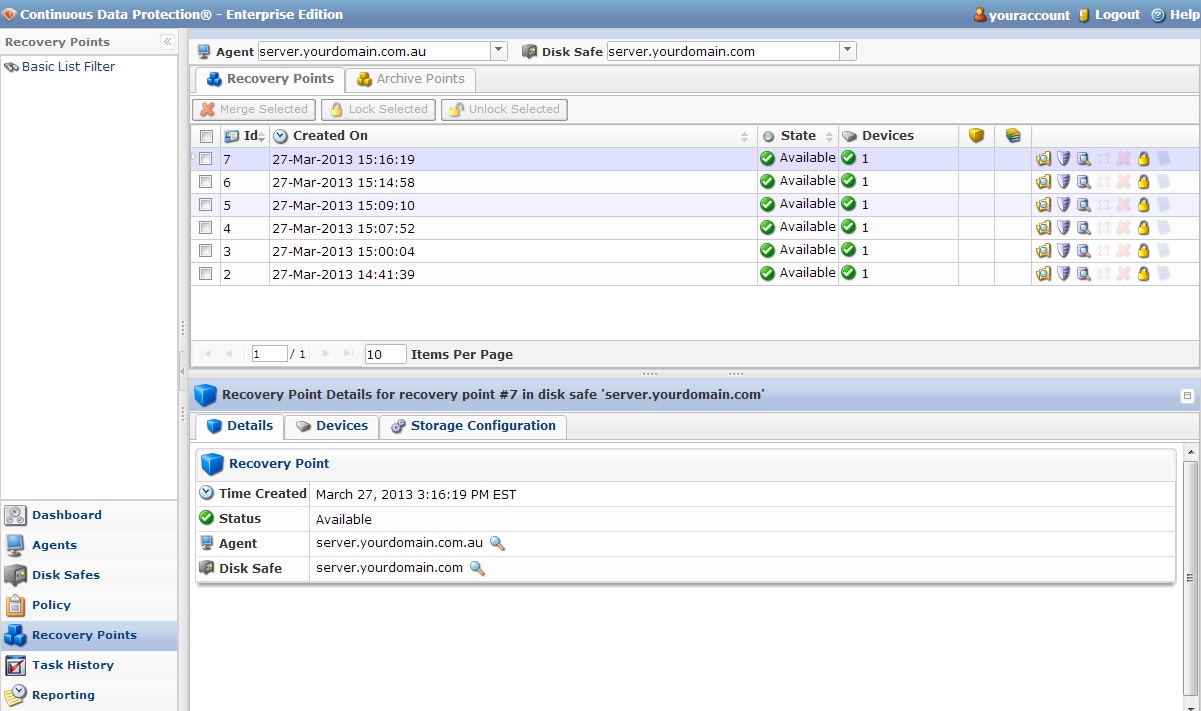
By clicking on a Recovery Point you have 4 basic options with icons on the right hand side. Clicking the folder icon will let you browse the recovery point. The metal shield icon will let you initiate a Bare-Metal-Restore and the next icon with the server and magnifying glass will let you browse your databases (if you have the Database Addon). If you wish to protect a recovery point so that it won’t be removed or recycled, you can ‘lock’ it with the padlock icon.
Note: Bare-Metal Restore requires booting your VPS or Dedicated Server using an R1Soft rescue disk and manually configuring network settings to connect to your backup server over private network. This is possible for experienced customers and we do have knowledge-base articles to guide you through this using Remote Console access. However, it will be much much easier & faster to contact our Support Team!
- Restoring Files
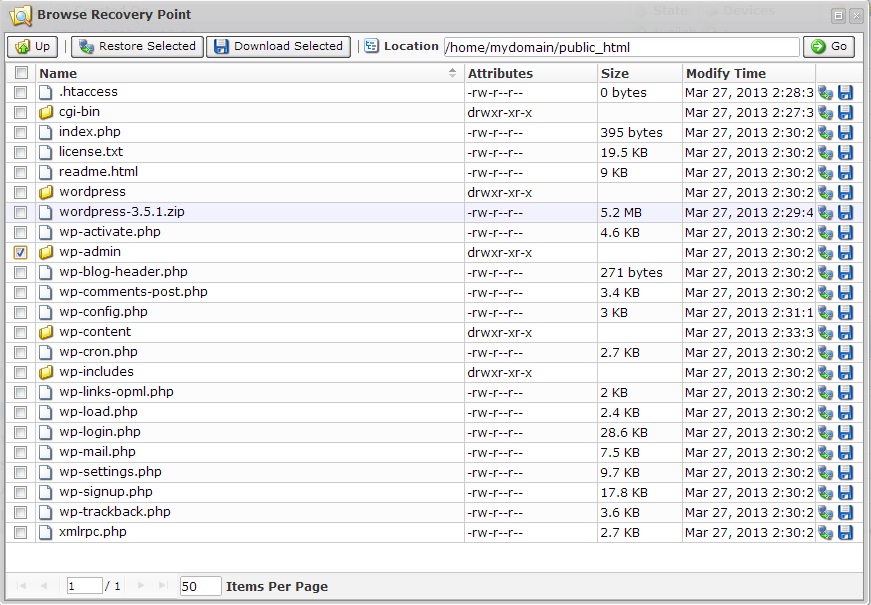
By clicking the ‘Browse Recovery Point’ icon, or double-clicking the recovery point you can browse the file structure that has been backed up. If you’ve accidentally deleted files in /var/www/ you can browse there, select the files or folders and click restore. Accidentally messup your WordPress installation? Simply browse to the right location /home/public_html/ select the files/folders you need and click ‘Restore Selected’!
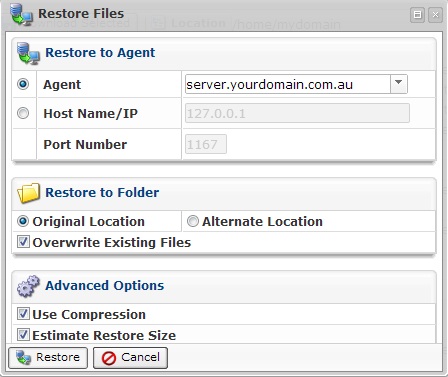
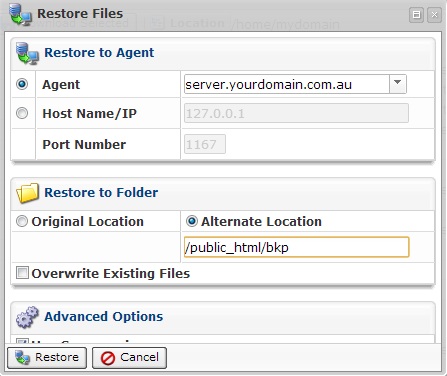
Once you click the ‘Restore’ icon, it will come up with some options. You can restore to the same location and overwrite existing files, or restore to an alternate location so you can manually compare/make changes etc.
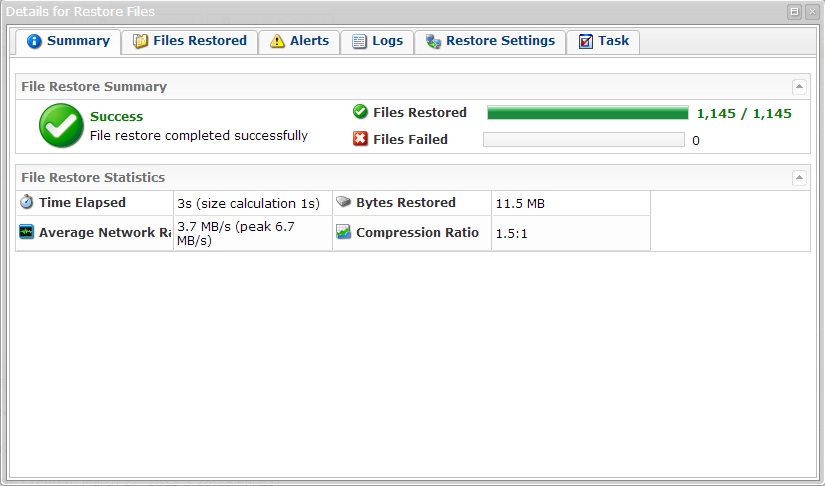
Click restore and the following window will popup giving you details of the number of files, size and transfer speed.
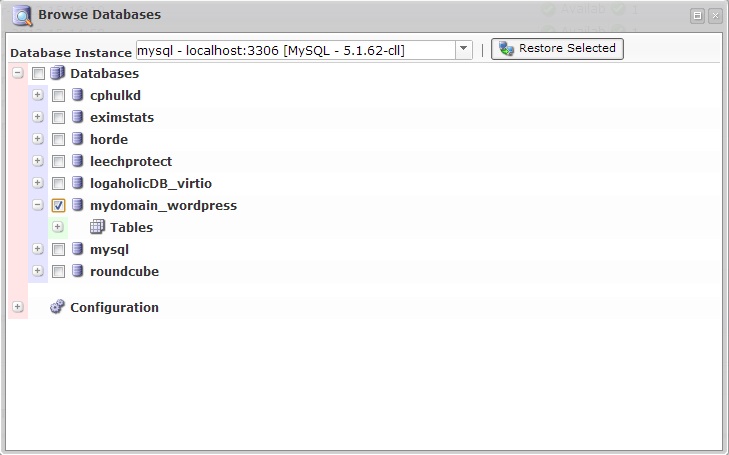
- Restoring Databases
By clicking on the ‘Browse Databases’ icon you can browse through your entire database structure. Select whole databases or individual tables to restore. Tick what you need, click ‘Restore Selected’ and wait for the magic to happen.
Hopefully you found that informative, especially customers who may be on the fence regarding a backup solution. All Crucial VPS & Dedicated Server hosting offers R1Soft CDP Backup as a Service Addon and is definitely worth considering. In a future blog, I’ll detail of the benefits of R1Soft Bare Metal Restore for disaster recovery. Along with guidance for performing Bare-Metal-Restores for customers on our Blaze Cloud VPS services using the OnApp control panel.
| Hosting Options & Info | VPS | Web Solutions & Services |
|---|---|---|